A hearty welcome to SanDee&amelie's challenge blog!

Please, note, that this challenge blog is not related to any business and run without any profit by people, who do this for your and their own leisure time fun! Our only reward are your encouraging comments and your playing along and sharing steampunk fun and mixed media techniques. We appreciate every single entry and comment so much! Thank you for taking the time!

If you are new to this place, please, know that we are so glad that you stopped by our little steampunk corner!
Whether you are a dedicated tag or card maker, art journaler or mixed media lover - this might be the right place for you!
For more information about the rules and the little "steampunk/industrial twist" we ask of you, please check the "about" stuff and then simply jump in and create!

If you are new to steampunk and not sure if this is "your thing", maybe take a look at our winners gallery on pinterest (use the linking button on our side bar). You will find that we're mainly a mixed media challenge blog with a little twist towards steampunk, industrial and/or vintage. So why not give it a try?

We are looking forward to seeing your fab projects entered to one of our challenges soon!


Hugs,
SanDee&amelie&the SASPC team

Friday, August 7, 2015

Extra Steam Power #3

Servus and welcome to another dose of "ESP" (Extra Steam Power) that will hopefully spark inspiration and have you wanting to rush to your crafting desks. This time lovely Kerstin from Scrapbook Dreams is sharing an easy to follow tutorial in which she shows how to get most out of your everyday stamps by adding a steampunk twist to them. Enjoy! xxx


***


Hi everyone,

Kerstin here today with a simple stamp technique, where you can "design" your own steampunk stamp 
- Two become one new -
with special effect ;-)

 All you need is:
two clear stamps and an ink pad 
for another variation an embossing ink pad, heat tool and embossing powder 
Are you ready to go :-)?!


  • 1. Ink your first stamp
  • 2. remove the color  with a lint-free cloth in the centre (or wherever you want)
  • 3. stamp with your first stamp
  • 4. find out wich part of the gear stamp suits. Using a clear stamp makes this pretty easy as you can see through
  • 5. ink only the part you need and stamp it on top the first stamped image
  • 6. voila, that's all :-) 
  • optional: if you use embossing ink and powder with step 5 you can also create some extra sparkling effect and texture


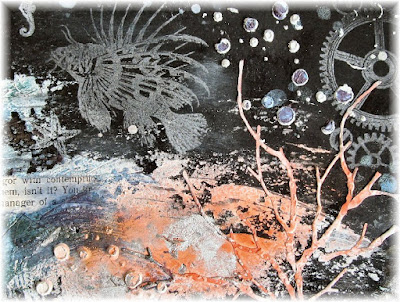
I used this technique on my art journal spread Under the Sea
more details you can see on my blog.


normal stamp Lionsfish


and the new steampunkfish

There are so many ways of combining your stamps!
Just try it and surprise us with your results (maybe already in