
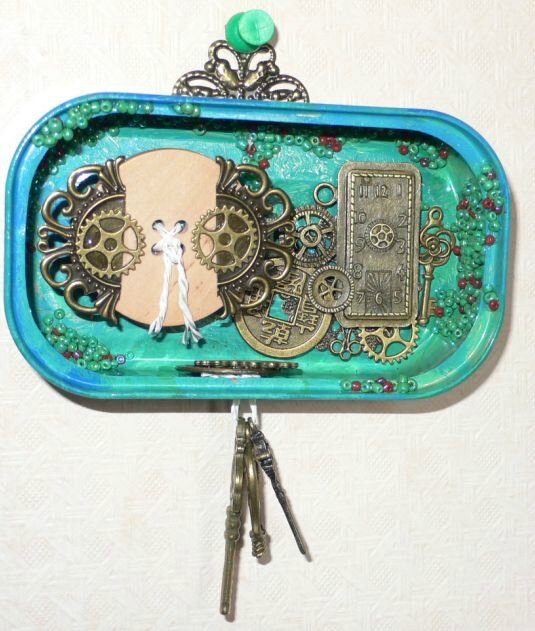
This time Brigitte from La maison de coutureuse has done her very unique magic on an old tin! I LOVE altering tins and hers looks absolutely brilliant!
But before I offer you this gorgeous steampunk eye candy I want to remind you that there are still three more days left to enter our actual "The Ravages of Time" challenge and by doing so get eligible for a fab prize win sponsored by Inspiration Emporium!
But now the stage is yours, Brigitte! Applaus, applaus, applaaauuuusssseeee!(doing my Kermit the Frog waving-about).
***
Une boite de sardine à la sauce steampunk/
Sardine can with steampunk salsa
Ma recette:
Les ingrédients : boite de sardine vide et propre, des breloques,
un bouton en bois, des peintures pour métal, du glossy pour coller,
des perles, du double face épais pour 3 D
My recipe:
Ingredients : sardine can empty and clean, charms,
wood button, paint for metal, glossy accents for glue,
beads, 3D sticky foam

La préparation :
faites un trou dans un côté de la boite,
peignez la boite en mélangeant les 3 couleurs, intérieur et extérieur, laissez sécher.
Collez des perles ici et là avec le glossy, laissez sécher.
Preparation :
make a hole in one side of the can,
paint the box with the 3 colors mixed, inside and outside, let dry
Glue some beads with glossy, let dry
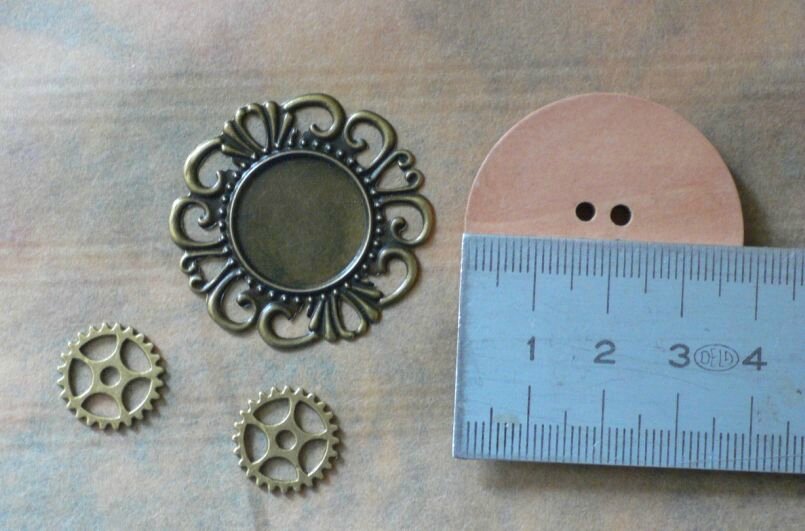
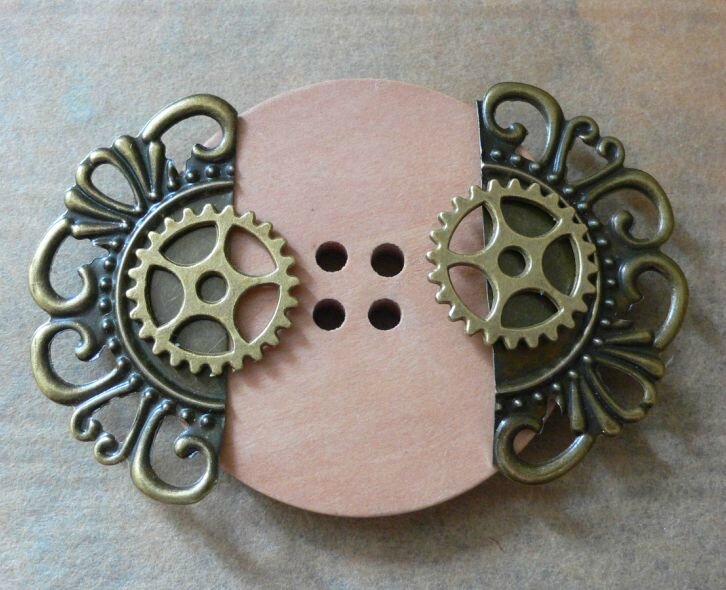
Pour le bouton :
découpez au milieu une breloque ronde,
collez sur l'envers du bouton,
collez des petits engrenages,
passez un morceau de fil dans les trous.
Button :
cut a round charm in half,
glue to the button,
glue on smaller cogs,
finish with a piece of thread in the holes.
Quand la boite est sèche collez à droite des breloques l'une sur l'autre,
la dernière breloque est collée sur du double face épais.
When the box is dry, glue charms on the right,
for the last charm use the 3D foam

Collez le bouton sur de la mousse puis collez dans la boite.
Glue the button on the foam and after in the box

Ajoutez quelques breloques sur un fil, passez le fil dans le trou,
nouez le fil à l'intérieur de la boite. Cachez le noeud avec 2 breloques collées dessus.
Add some charms on a thread, insert the thread in the hole,
make a bow in the box. cover the bow with charm
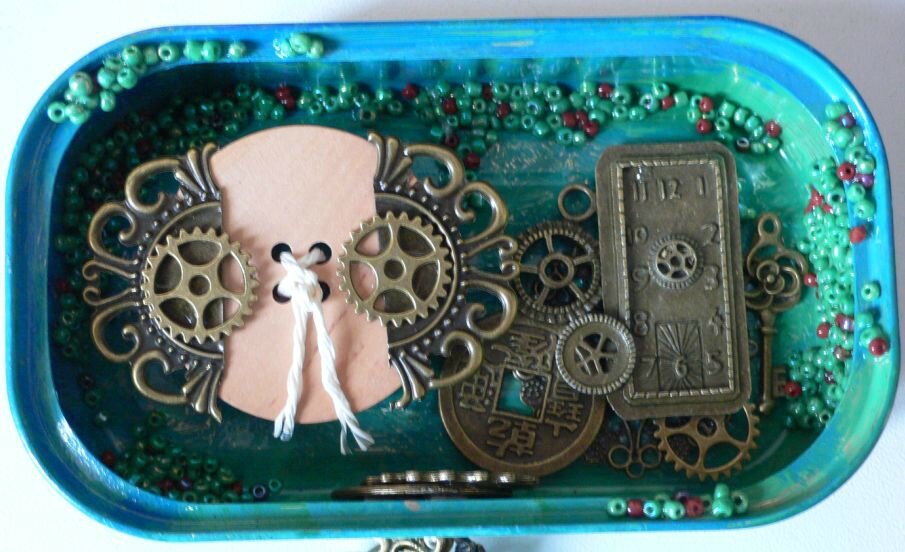
Au dos collez une dernière breloque qui servira d'accroche.
Glue a charm to the back of the tin to use as a hanging device.
Et voilà, bon appétit !!!!!!!!

***
Hugs and happy crafting,
Claudia & the SASPC team
xxx
belle dégustation pour nos yeux merci
ReplyDeletebiz nate
Quelle transformation! Très réussie, j'aime beaucoup.
ReplyDeleteBrigitte, this is lovely! What a change!! The beads are a great element you've placed in it, and of cours, the colors and all are just beautiful. Wonderful little piece.
ReplyDelete